Cross-Institution Collateralized Loan Flow on Hamsa Privacy L2 Networks: Deployment & Testing Guide
This step-by-step guide walks two financial institutions through deploying and testing a collateralized loan workflow on separate Hamsa Privacy Layer-2 instances with final settlement on a shared Layer-1. It covers environment preparation, smart-contract configuration, relayer setup, script execution, and use of a web interface for real-time monitoring—ensuring full traceability, operational independence, and privacy compliance throughout the process. Ask ChatGPT
Overview
The proposed scenario simulates a collateralized loan between two distinct financial institutions, each running on its own Layer 2 (L2) instance, with final settlement occurring on a shared Layer 1 (L1).
Communication between nodes is carried out via relayers, and the smart contracts are deployed locally on each instance. The workflow covers environment preparation, variable configuration, script execution, balance checks, and use of a supporting graphical interface.
All elements in this flow are auditable, and the processes fully comply with regulatory requirements for traceability, operational independence, and privacy assurance.
Prerequisites
This guide assumes that:
- Both Hamsa Privacy instances are already installed and operational.
- Funds have been transferred from Layer 1 to Layer 2.
You will need two separate components:
- The Hardhat-based smart-contract environment.
- The web application (graphical interface) for interacting with the deployed contracts
If you are simulating two participants locally, repeat the setup process twice—once for each node.
Smart-Contract Deployment and Relayer Execution (Hardhat)
1.1 hardhat.config.js
hardhat.config.js- In
networks.server_L2, insert your Hamsa Privacy RPC URL—for example,http://134.33.254.24:8123- replacing the empty string. - In
networks.server_L2_partner, insert the partner institution’s Hamsa Privacy RPC URL—for example,http://135.33.254.24:8123- also replacing the empty string.
These endpoints must be accessible both locally and by the relayer.js process.
1.2 `demo_config.js
`
Edit and configure the following variables—infrastructure contract addresses defined during your Hamsa Privacy installation:
poseidon_hash_address
poseidon_t4_address
dvp_match_address
l1_verifier_address
l1_event_address
l1_bridge_address
l1_tmsc_address
l1_erc20_address
l1_erc1155_address
l2_tmsc_address
l2_escrow_address
loanTpftId
These addresses must match the ones used by the partner institution.
Operational settings:
user_sk: private key used to deploy the contracts and participate in the loan flow. This address must hold balances of
DREX
TPFT
Native token (for gas)
l1_bank_address: your institution’s L1 bank address responsible for depositing funds into L2.partner_user_l2_address: the counter-party user address on the partner’s L2 node.partner_l1_bank_address: the partner’s L1 bank address that deposited funds for partner_user_l2_address.partnerLoanProxyAddress: the counter-party’s loan contract address monitored by your relayer.relayer_user_sk: private key your relayer uses to sign transactions on the counter-party network—must hold native-token gas.
Important: Token and contract addresses on Layer 1 must be identical for both institutions to ensure compatibility.
Node-to-Node Communication via Relayers
Each institution must run a relayer to communicate with the counter-party’s Hamsa Privacy instance. The partner’s relayer must also be active and funded with gas. This bidirectional communication keeps messages synchronized and delivered between the two nodes.
Production environments may later adopt external messaging protocols (e.g., HTTP APIs or encrypted L1 writes). This guide assumes direct relayer-to-relayer communication.
Script Execution
3.1 deploy_loan_contracts.js
deploy_loan_contracts.jsDentro do script, defina um pairIdentifier compartilhado. Esse valor exclusivo é utilizado para gerar os hashes criptográficos das transações DVP (Delivery versus Payment).
The identifier must be identical on both nodes to keep the hashes consistent.
3.2 Step-by-Step Instructions
a) Ensure the address tied to user_sk holds sufficient balances of:
- DREX
- TPFT
- Native token (for gas)
You can validate balances with:
check-privacy-balancesb) Deploy the loan contracts:
deploy\_loan\_contracts.jsc) After deployment, copy the contract addresses:
loanProxyAddresslienAddress
…and update them in:
demo\_config.jsd) Verify the l1_bank_address values.
These addresses are used for final L1 settlement.
Remember: L1 deposit addresses differ from L2 user addresses.
e) Run a test transaction to validate the contracts:
sanity-test-privacyf) Start the relayer and confirm it is idle and listening for events:
relayer.js
Graphical Interface (Web Application)
4.0 Purpose and Context
The web interface lets users interact with the deployed contracts, perform loan actions, and track balances and transaction status in real time. It simplifies testing by enabling:
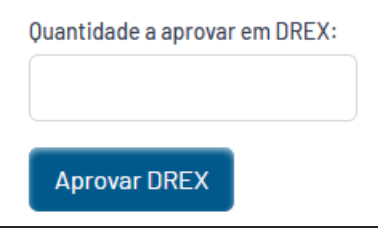
- DREX approval
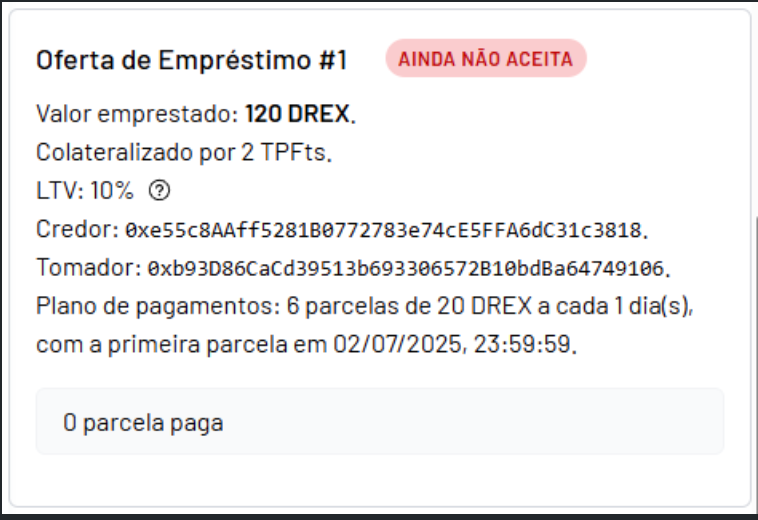
- Loan-offer creation
- Confirmation that the counter-party received the offer
- Visual confirmation of L1–L2 synchronization
The interface mirrors expected production behavior, providing transparency and accessibility for regulators and developers alike.
4.1 Installation
a) Install these dependencies:
Node.js v18.18.2  (check with node -v)
npm v9.8.1        (check with npm -v)
b) Install project packages:
npm installc) Create .env.local from .env.example and set all environment variables for your instance (defined during Hamsa Privacy installation):
VITE_L1_TMSC_ADDRESS="0x... (L1 TMSC Address)"
VITE_L1_ERC20_ADDRESS="0x... (Address of the ERC20 token deposited in the L1 Bridge)"
VITE_L1_ERC1155_ADDRESS="0x... (Address of the ERC1155 token deposited in the L1 Bridge)"
VITE_LOAN_TPFT_ID="3 (Token ID of the deposited TPFt)"
VITE_LOAN_PROXY_ADDRESS="0x... (Address of the Loan Proxy contract)"
VITE_SIMPLE_REPAYMENT_ADDRESS="0x... (Address of the Repayment contract)"
VITE_LIQUIDATOR_ADDRESS="0x... (Address of the Liquidation contract)"
VITE_LIEN_ADDRESS="0x... (Address of the Lien contract)"
VITE_BANK_ADMIN_ADDRESS="0x..." (The address of your bank on L1, which deposited the tokens defined above on L2.)
VITE_L1_NAME="DREX Network"
VITE_L1_RPC="http://example.com/drex/rpc"
VITE_L1_CHAIN_ID="369..."
VITE_L2_NAME="L2 of Institution X"
VITE_L2_RPC="http://example.com/institution/rpc"
If needed, consult the backend scripts to confirm expected parameters.
d) Start the development server:
npm run dev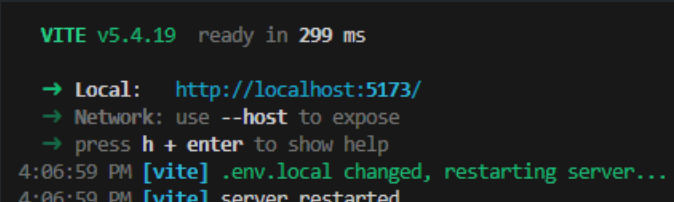
4.2 Functional Execution and Validation
a) Open the application in your browser via localhost.
Verify that the L2 account balance and L1 bank balance are displayed correctly..
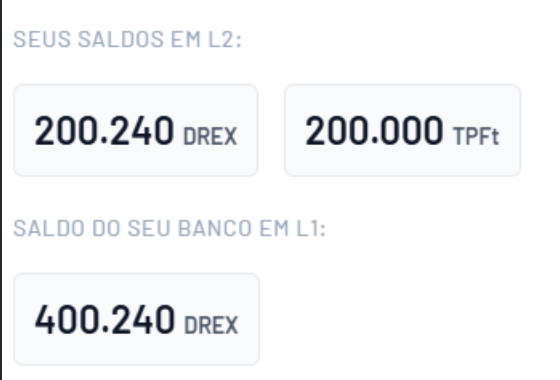
- Your L2 account should contain:
DREX
TPFT
Token nativo (visível no Metamask)
- The partner bank must also hold a DREX balance.
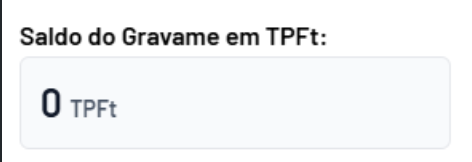
b) Check the “Lien” field at the bottom left of the interface—it should initially show 0 TPFTs.
c) Confirm that relayer.js is still running and receiving events.
d) From the interface:
- Approve DREX
- Create a loan offer
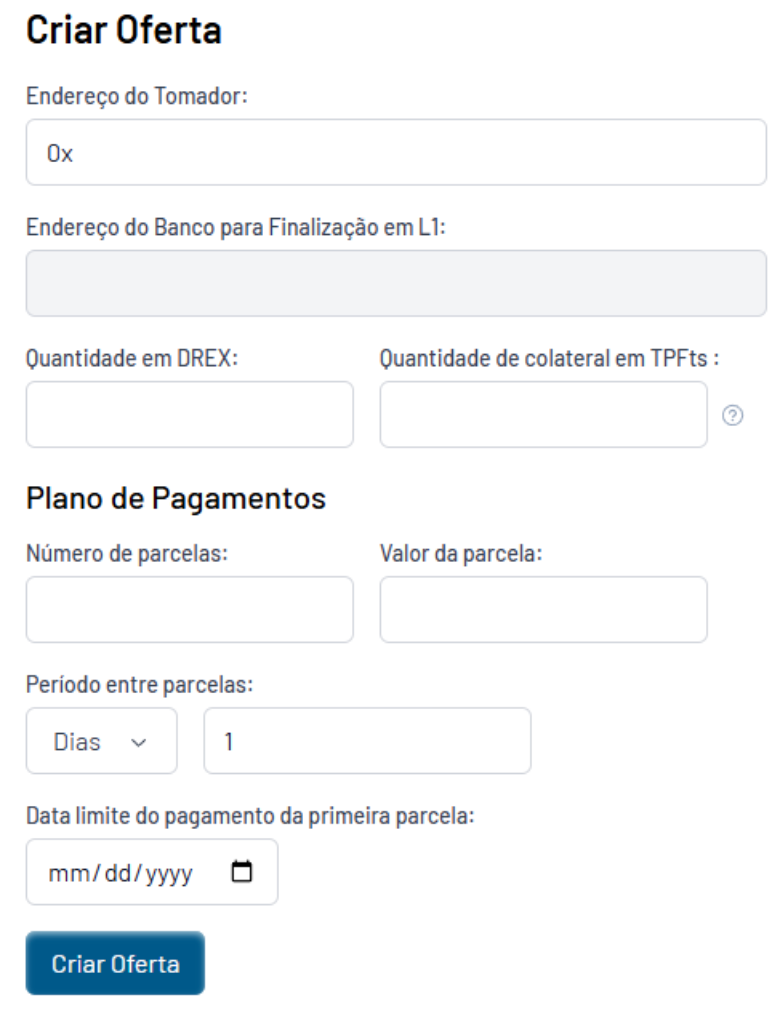
- Click the generated link to verify the transaction.
e) On the counter-party interface, confirm that the offer was correctly received on the partner’s L2 instance.